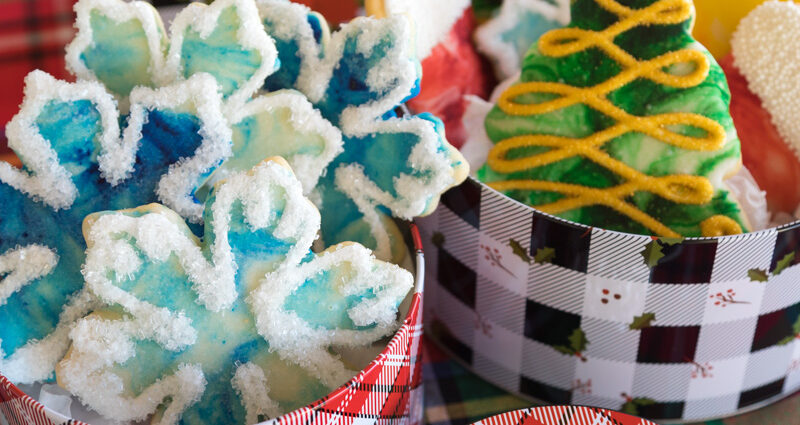
Every year about this time I gather my favorite cookie cutters, rolling pins and sugar decorations. It’s been a tradition of mine to prepare pounds and pounds of buttery sugar cookie dough. My family loves it when I declare the main baking day for all the Christmas cookies and desserts.
The usual Christmas trees, snowflakes and stocking cookie cutters are there but so are sleighs, Santas, snowmen, gingerbread men and poinsettia flowers. My cookie cutters are sturdy with sharp edges that truly do cut the cookie out. May favorite go to cookie cutters can be found at The Cookie Cutter Shop and Ann Clark Cookie Cutters.

I love using rolling pins that have embossed patterns that adds such a beautiful touch to my sugar cookies. My favorite happens to be a lace pattern. Once I roll it over the dough I use the snowflake cookie cutter to cut beautiful textured cookies.
When I owned my bakery, I taught my employees how to make this recipe, from the dough to the icing, and then how to cut and decorate the cookies. Hours of laughs and story telling happened as we worked through the customer’s orders. Lacy white snowflakes dusted with blue sugar, bright red sprinkles topped the Santa hats and frosted iridescent sugar glistened on the sleigh cookies.
Adding a Bit of Flavor and Color
Using vanilla and almond extracts are the most traditional, but here are a few options for you to try.
- Orange extract
- Peppermint extract
- Maple extract
- Champagne extract
Adding a bit of orange, lemon, or lime zest to the cookie dough adds an amazing bright citrus flavor to your sugar cookies. Adding cinnamon, cardamom, or ginger powder to make a spiced cookie. Coloring your cookie dough can add a fun look to your decorated cookies. Add in the food color after the butter and sugar are creamed together, mix well to distribute the color evenly. If you can, use America Color or Wilton gel colors. Both companies have a rainbow of colors that are highly concentrated and cost effective.

Top Cookie Decorating Blogs
Over the years, I have followed top cookie decorators videos, read their blogs, and practiced their tutorials. If you have the time, please visit each of the linked websites so you too can master a full range of cookie decorating techniques.
Sweet Ambs– If you are a Pinterest follower, YouTube subscriber or lover of Martha Stewart, then maybe you might know who Amber Spiegel is. Brilliantly talented and truly a cookie magician, she can help you design and create cookies that are pieces of art.
Sweetopia– One of the happiest blogs that has everything to do with creatively fun decorated cookies. I came across Marian’s tutorials back when I had my bakery. Through her tutorials, I would pass on her technique to my staff at my bakery. Her diagrams, tricks, and tips will have you creating the cheeriest cookies you have ever seen.
Hanielas– Pop culture and perfectly decorated themed cookies are this extraordinary blogger and bakers passion. Haniela is also a brilliant YouTube host, sharing her knowledge with as many people as she can reach. My favorite video is her simple to follow royal icing poinsettia flowers.
Decorating Your Cookies
Traditional royal icing is the choice for decorating sugar cookies. You can use multiple techniques like piping, flooding and glazing sugar cookies from one recipe. The icing dries with a firm texture. I’ve found this recipe by Wilton is the simplest recipe to follow.
Sanding sugars, edible sugar pearls and jimmies are exactly what you need to finish your creations. I’ve included a few links to my favorite decorating websites for you.
Make them Fancy
If using piping bags and decorating tips has you scared, don’t worry! Try marbleized decorated cookies, it’s simple, fast and a 4-year-old can do it. I created the decorated cookies in this blog post with this technique. The only difficult part will be deciding what colors to use.
Happy Holidays to you and your family, I hope to see some of your brilliantly decorated on social media. Make sure to post a picture on The Campground Gourmets Facebook page. You can also post them to Instagram with the hashtag #TCGCookies

Ingredients
- 3 cups unbleached all-purpose flour
- 1 teaspoon aluminum free baking powder
- 1/4 teaspoon kosher salt
- 2 sticks unsalted, softened butter
- 1 cup granulated sugar
- 1 large egg, room temperature
- 2 teaspoons vanilla extract
- 1 teaspoon almond extract
Instructions
- In a large bowl sift together flour, baking powder, add salt, set aside. In a small bowl whisk together egg, vanilla and almond extract, set aside.
- In a mixer cream together the butter and sugar until light and fluffy, 3 minutes. Scrape the bowl down.
- With the mixer on low add the egg and extract mixture, mix for one minute.
- With the mixer off, add the flour mixture to the bowl. Turn on the mixer to low and mix for 30 seconds, if the mixer is struggling increase the speed to medium-low. Mix until the flour is incorporated. Scrape down the bowl and mix again if needed.
- Turn out cookie dough onto a clean and lightly floured surface. Knead for about 30-60 seconds until the dough comes together, shape into a ball then flatten into a disk shape. Cover and refrigerate for an hour or up to three days. Can be placed in the freezer up to a month.
- Preheat oven to 350F
- Divide cold cookie dough in half, roll out one half of the cookie dough to about 1/4 inch thick, between 2 pieces of parchment paper, cut out cookies.
- Place the cookies on a parchment lined baking sheet. If using decorator candies or sprinkles, apply them now. Chill the cut outs in the fridge for about 15 minutes. Bake cookies for 10 minutes; rotating the baking tray half way through the baking process.
- Remove the cookies from the oven, let cool on the baking tray for 5 minutes then transfer to cooling rack.
- Store in the airtight container up to 5 days or freeze up to one month.
- Decorate cookies as desired with royal icing or dip into melted chocolate.


 Save Recipe
2 Comments
Comments are closed.